Thursday, November 03, 2022

Ash Ketchum's Pokémon Journeys Backpack • Recycled Materials Notes


Outer shell: 
Green material and carrying handles: $1.99 grocery tote
Black material: Leather from a broken office chair
Logo: Free rubbery fabric swatch that came with something I ordered

Inside lining: Black satiny fabric from an evening gown

Labels: , , , ,


Tuesday, November 01, 2022

Ash Ketchum Pokémon Journeys Costume

Here is a little guide I put together in case anyone wants to make an Ash Ketchum costume:


Ash Ketchum Outfit:

Cap

Ash has a red baseball cap with a white bill.

I used a red baseball cap and painted the bill white. For the logo I traced the image off my computer screen to make a pattern and then cut it out of black and green felt. I stitched it on with my sewing machine, which was a challenge, but it can easily be glued or hand-stitched to the front of the cap.  An embroidered logo would look great too! 


Shirt

White cotton t-shirt in a thicker weight with a painted red stripe.  Mask off the stripe with painter's tape and insert a piece of cardboard inside the shirt to prevent bleeding to the back of the shirt. 


Vest
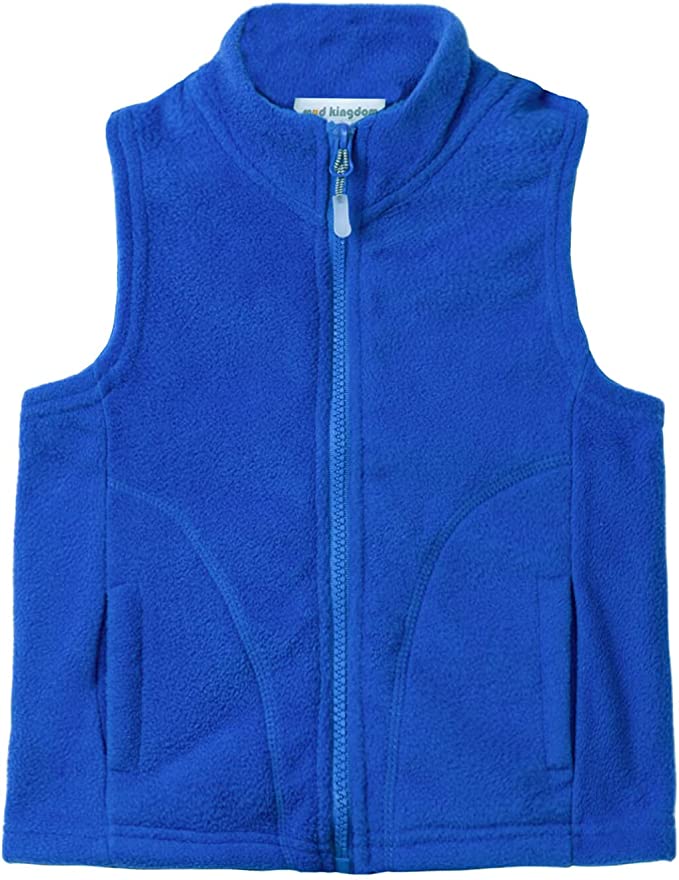


Blue vest with yellow twill tape stitched on as a trim.


Gloves

Black fingerless gloves with stretchy red cuff fabric.


Shorts

Blue shorts with black stripe on side.  I just used jeans because it was chilly out, but blue shorts with a stripe of removable matte black tape or 2" black cotton twill tape added would work well during warmer seasons.

Footwear

Black sneakers with white string/shoelaces in an X and blue gaffer's tape for the blue details.

I haven't personally tried the gaffer's tape, but it is supposed to come off easily without leaving a residue unlike duct tape.

If you are going all in... I also saw that you can order custom shoes!


Ash Ketchum Backpack:


Outer shell: I cut apart a green bag that I purchased for $1.99 and upcycled black leather from a broken office chair seat.

This green canvas fabric looks like a good color match and weight and can be combined with black canvas/leather/faux leather for the base of the backpack.


For functionality I added a zippered front and side pockets and also added in the original shopping bag handles.

Lining: I used some black satiny material from a party dress that I had no chance of fitting back into. Black ripstop would be a good choice if I were going to make something similar again. 


Zipper: I used a 18" purse zipper in black. The on screen zipper looks light gray like the buckles and extends all the way down to the black part of the bag, so depending on the size of your backpack, you might be using something like a 27" zipper. 

Logo: I cut the logo from a black, non-fraying material using the same pattern pieces from the hat. I had a square sample of rubber-ish fabric in my stash that I was able to use. 


Black Straps and Silver Buckles: I used 1.25" cotton webbing but any 1"-2" polypropylene webbing will work fine too with coordinating silver slider buckles.

If you don't want to make the backpack from scratch, you can customize a green backpack like this one –


Extras:

This Pokémon 
Poké ball tin dents easily, but it still makes for a decent prop. 
...and don't forget your best buddy Pikachu!


Labels: , , ,


Tuesday, October 29, 2019


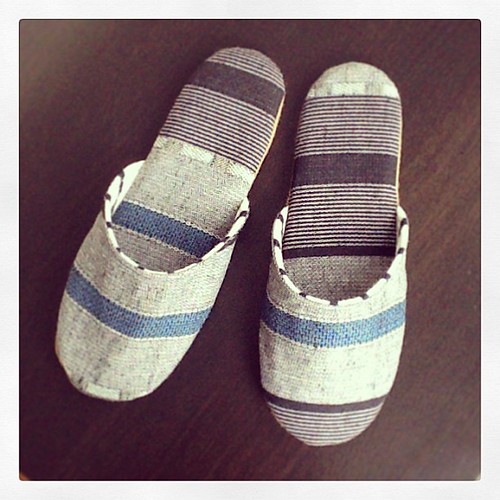
House slippers for my son made from cotton twill cat fabric that I designed a few months ago.  I might remake these (for myself) with some interfacing, lining and stiff heel support. I upcycled his underwear elastic for the green band around the ankle :)

Labels: , , , , , ,


Wednesday, September 25, 2019


Testing out a piping presser foot with some recycled gift bag handles and scrap wool felt. I am thinking this would look cute as a pocket detail.

Labels: , , , , , ,


Monday, September 23, 2019

Upcycled jeans marker and pen case


This case was made out of my husband's jeans, some Mod Podge, and an Amazon cardboard box. I made the markers from a kit I purchased on the Crayola website (Crayola Marker Maker kit refill), so much fun to mix the colors, I want to make more!!

Labels: , , ,


Wednesday, April 19, 2017

Reconstructed headphone ear pads

Reconstructed using a swatch of organic cotton jersey of my "tribal lines" print

Above is a pic of the UrbanEars headphone ear pads taken apart. I reused all the components other than the top fabric with the peeling paint. These ear pads are great because they click right back in easily.

My son thought I was making donuts while working on this :), so keep away from hungry toddlers.

Labels: , , ,


Thursday, December 18, 2014

Recycled calendar -> gift wrap

Old calendars make awesome, thick wrapping paper for small items.

Labels:


Tuesday, August 19, 2014

What to do with stained baby clothes?

Chop it up and make a new outfit!

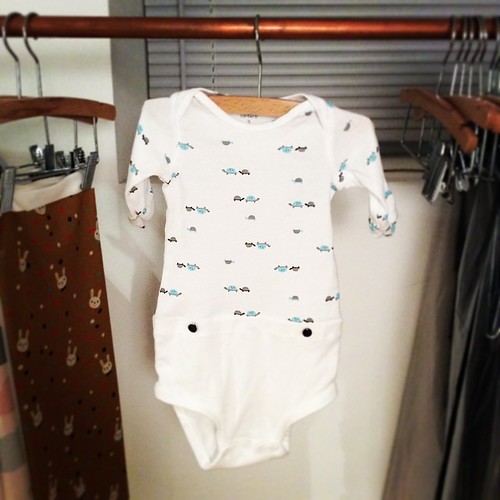
First sewing project with NiNi clothes. Onesie hybrid with Mickey Mouse inspired buttons :)
This is my first sewing project with recycled NiNi clothes. A onesie hybrid with Mickey Mouse inspired buttons :). This project gave me the idea to cut up my own clothes and make stuff for him instead of buying new things, using his existing wardrobe as the base pattern. Baby clothes stress me out, such limited time usage and then you wonder everyday if you should save it in case another baby comes along.  I won't feel bad about reworking the stained clothes or my clothes though, so this is the start to some fun times at the sewing machine. Naps and grandparent babysitters permitting.

Labels: , , , ,


Monday, April 29, 2013

My life just got 1.88% better


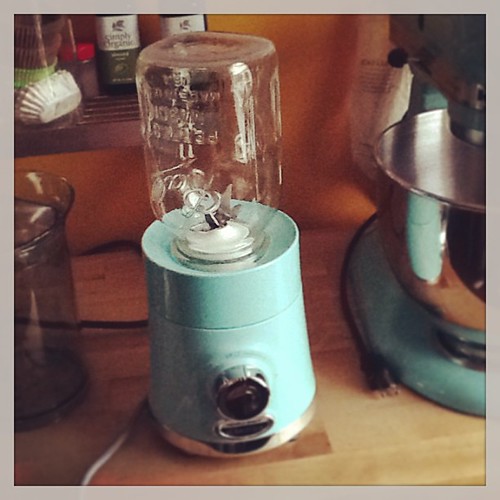
Attach a mason jar to your blender for personal size smoothie making!!

You have no idea how redunk excited I am to come across this! I spent my whole day looking for a replacement for my glass blender jar that had chipped. It was going to cost me $28 bucks to have one shipped from the manufacturer. Then I thought I could probably just buy a whole new blender for that price. Lo and behold I saw a personal size blender on Amazon for a disturbingly low price ($14.69). Trying to resist buying anymore cheap plastic crappola for my home, I restarted my glass blender jar search hoping for a better deal. And THEN I stumbled across this idea! Apparently this concept is an oldie (40-50 years old!?) but looks like it is making a comeback due to the popularity of the "Magic Bullet" type blenders out there.

I ran around the apartment looking to see if any of my glass jars fit my blender base. I took a TJ's tomato sauce jar out of my recycling bucket, ripped off the label, washed it out, and twisted it on, it fit, sort of, but wasn't deep enough to include the rubber gasket. I moved on to an empty instant coffee container and it fit gloriously with the gasket and all.  I gave it a test run with some water to check for leaks. Everything was A-O-K. I then proceeded to have a horror-movie-flash-vision of the glass shattering and flying all over the place and impaling everything in its path. Soo...I decided to run to my parents house and get one of their tempered glass canning jars to play it safe. I made my smoothie and drank it straight out the jar with my stainless steel straw and it was awesome! A little white trashy....but awesome! I am going to save so much time/sink space not having to clean my large blender jar and an extra glass! If you try this make sure you only fill it halfway and don't use anything hot because the steam might make it explode(not good).

Labels: , ,


Friday, March 22, 2013

...and a pair for me


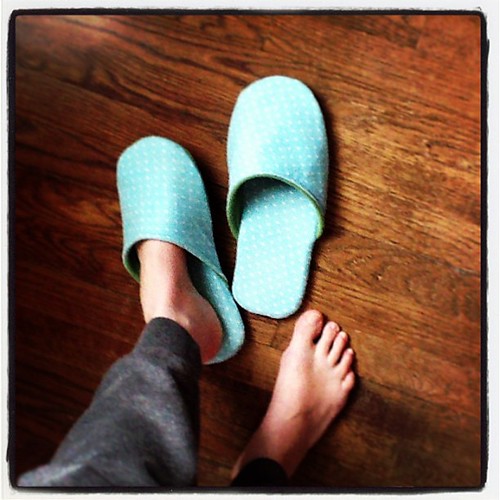
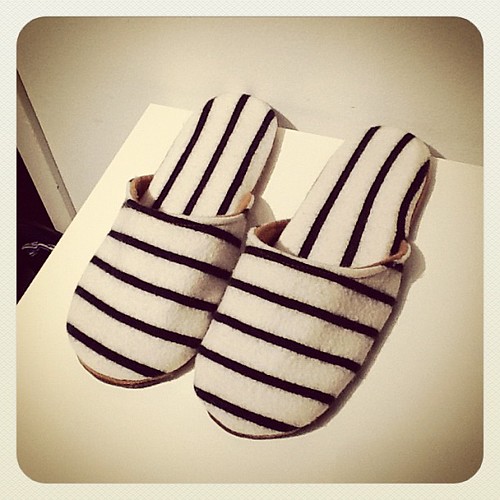
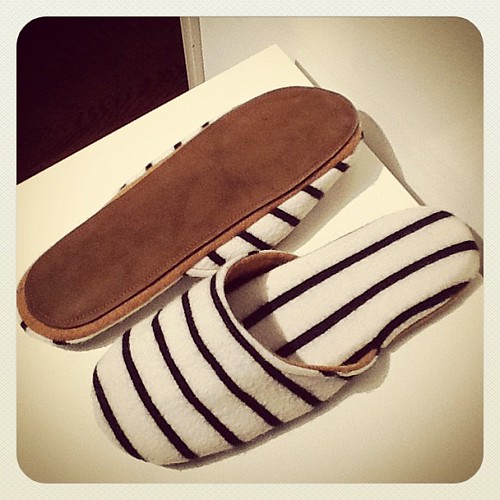
Made out of a lightweight polka dot fleece fabric with a green wool lining and leather sole (sueded side out).  I used the sole of an unworn pair of flip flops my aunt gave me as "the filling".  Any part of my body + thong = not gonna happen.  I ripped out the thong part, trimmed the toe area a bit to make it rounder and then used it as a template for the rest of the pattern.
Although it feels good on the skin, I don't recommend using fleece for something like this. It already started to pile from just making it. [Insert "did I just waste 10 hours of my life?" sad face here] Even though I interfaced all the pieces I feel like it is not going to hold up that well and will collect dirt and dust easily.

For the top part I used the pattern piece from the other pair, but adjusted the pattern to make it longer lengthwise for more footsie coverage.

Labels: , , , ,


Wednesday, March 20, 2013

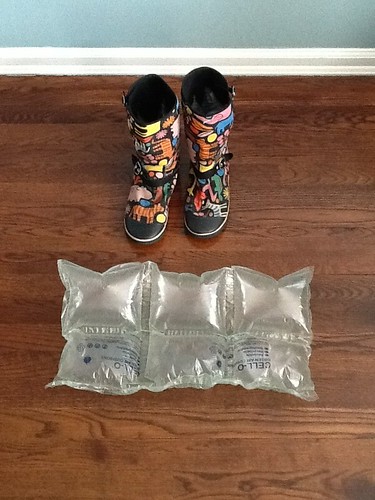
Good re-use of bubble wrap/ air cushions


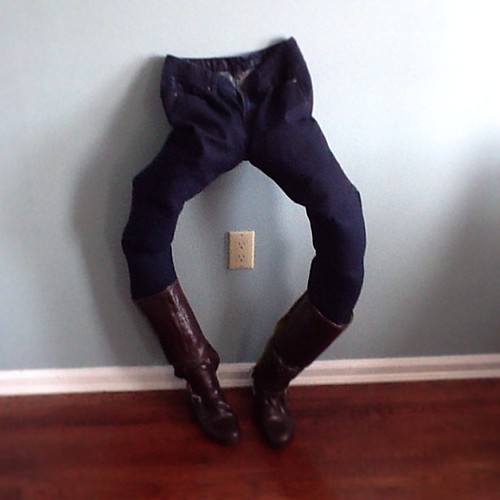
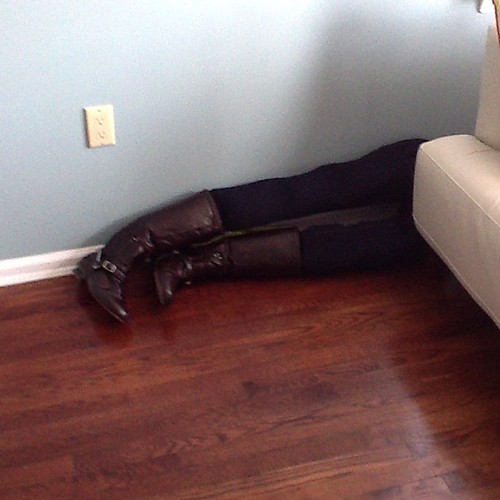
Other than recycling it for other packages, it works well to keep your boot legs in shape while not in use.

Does not work well for:
Untitled
Skinny Jeans
 Scary sheeeeeiiit
Unless you want to creep yourself out.

Labels: , ,


Friday, March 15, 2013

Sal slippers 2.0. Didn't match up the pattern, whoopsie!


Recycled leather sole and foam padding from the last pair and used more of my shrunken wool sweater for the lining.

Labels: , , , ,


Tuesday, November 06, 2012

Work Apron Completed!

(click photo to enlarge)

It was on my to-do list for months.  I guess all the elements needed time to get together. I used the zipper from the hoodie that I recycled into the leggings to make a double pocket in the front and a pair of suspenders that I purchased in Italy made out of a cellulose material that has both the appearance of a paper bag and strangely, leather. Unforch I made the pattern before the storm/pre-halloween candy chewfest 2012 and it is a little snug on the hips. With some leggings underneath I think I can ease a little of the stress off those poor red snaps. I think a few laps around the block could help too. Also, I am very happy to finally use the cute red riding hood ribbon trim designed by Rosa Pomar that I had stored away from a few years ago.

Labels: , ,


Thursday, October 04, 2012

Hoodie -> Leggings


I tried it...converted one of my zip up hoodies into funky leggings! After disassembling my hoodie I started to build up the leggings with the arms first and then stitched all the pieces together until they looked like m.c. hammer pants.  A few hours of cutting stitching darting and gusseting and I have some wearable pantaloooons.

Labels: , , ,


Saturday, June 02, 2012

I recycled my shrunken wool J. Crew sweater :(  into some new slippers for Sal :). I took apart his raggedy old slippers to try to salvage what I could and to trace the existing material to make a new pattern.  I took out the foam insert, washed it and used it as a guide for the shape of the sole pattern. I added a seam allowance to the traced pattern and then cut it out of the sweater. I cut open the sleeves for the top parts and used the front of the sweater for the foot beds. I stitched on a piece of nubuck leather left over from my peasant booties onto the sole to avoid any super slippage and used tan wool left over from making Timmie cocoons for the lining. I added some more padding to the foam inserts with these:
Easily available at pharmacies, and saw them here for 99 cents.

I left an opening by the toes to slip in the foam insert and then flipped it inside out and hand stitched it closed.
Slippers for my honey made out of my accidentally shrunken sweater.Untitled

Labels: , , ,


Thursday, May 17, 2012

basement mural


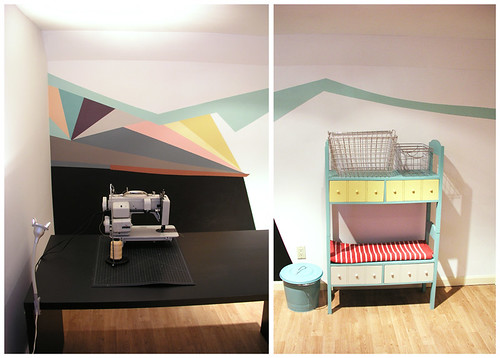
Here's how the paint sample mural turned out.

basement studio mural
The storage bench on the right is actually 2 benches that I found in the trash that I stacked and had my dad add pegs to secure.

I still have a ton of paint left over after painting the wall and the storage bench. I probably only used about $6 worth.

Labels:


Wednesday, March 21, 2012

Fair Isle Leggings

I would like to make a pair that look something like this. This is a photo of my legs squeezed into the arms of a slightly too snug hooded sweatshirt.  Since I haven't been wearing this sweatshirt anyway, I am going to take it apart and see if I have enough material to make a full pair of leggings for myself.  I think with some brown boots and a tunic it might look cute and less pajama-y.

Labels: , ,


Friday, December 09, 2011

First attempt at needle felting

I've never thought about doing needle felting before until I bought some wool yarn and the description said,"great for needle felting".  The light bulb finally went on to start using my yarn scraps for something useful.

The first project ~ Unintentionally Creepy Oven Mitt!

I used the wool from the shrunken pillowcase debacle, which I first mentioned in this post from last year and scrap yarn that I had been saving in a glass jar for a few years. [insert happy recycling dance]

I have no idea if I did *it* right, but I guess time will tell during usage.

Labels: , ,


Friday, October 28, 2011

debranding promo items


removed Dr. info and most of logo with a 1-2 punch of 91% by vol. isopropyl alcohol and orange essential oil with some aggressive q-tip swiping.

Warning: I don't know how safe this is, but I do know that both of these liquids are flammable, so use in a ventilated area away from open flames, smokers, flame throwers and circus clowns (they are creepy).

Labels:


Thursday, October 27, 2011

bar stool makeover


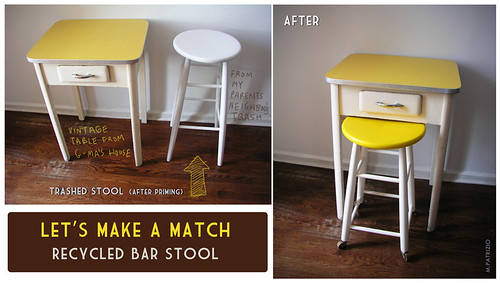
Another trash to treasure! My dad saved this bar stool for me that he had gotten out of the neighbor's trash. The varnish was worn off on the top but it looked perfectly fine otherwise. Everything is free on this project except the wheels! The cream colored paint was left over paint that I borrowed from my parents after they painted their garage and the yellow is artist acrylic that someone gave me years ago after they had given up on painting and decided to focus solely on drawing. Two cheers for free paint. Hip, hip, hooray! I've been obsessed with adding casters to every new home furniture project lately, so I had these wood wheels in my stock pile that I purchased last year (or was it 2 years ago?). I'm very excited about my new kitchen seating! Salvaging and stool shortening credits go to my papa, Mr. P! The vintage table btw was um, "borrowed" from my grandma's house when I moved into my apartment about 8 years ago.

p.s. If you use artist paint, make sure to seal the surface with a clear varnish after it completely dries for durability.

Labels: